How To
Your plants' health starts with knowing if your soil is too acidic or too alkaline—soil pH strips give you that answer in seconds. 🌱 I've tested hundreds of gardens, and these simple strips reveal the hidden chemistry affecting every leaf and bloom.
No lab, no guesswork—just dip, wait, and adjust. The best part? You don't need a green thumb to use them. Grab a strip, a sample of moist soil, and a color chart.
Within 60 seconds, you'll see if your soil is perfect for tomatoes (6.0-7.0), blueberries (4.5-5.5), or roses (6.0-6.5). Misread the color? I'll show you how to avoid that. Once you know your pH, fixing it is easier than you think.
Lime raises pH, sulfur lowers it, and compost builds long-term balance. My azaleas went from sad to showstopping after one adjustment—proof these strips change everything. Perfect for container gardens, raised beds, or in-ground soil. Let's get your plants the right foundation!
📚 In This Guide
- What you need
- Instructions
- Tips and common mistakes
- Wrapping up and next steps
What you need
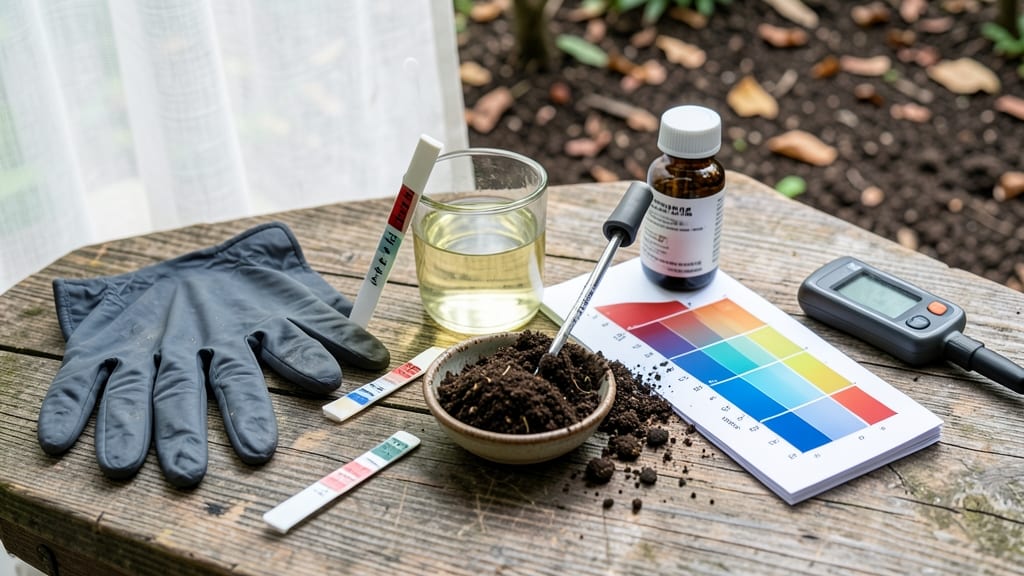
- ● Soil pH test strips – A pack of 10-20 strips (e.g., blank">LaMotte Soil pH Test Strips or blank">API Soil pH Test Kit). Choose strips with a color-coded scale (3.0–10.0 pH range) for easy reading.
- ● Fresh soil samples – Collect 3–5 small samples (1 tsp each) from different depths (0–6 inches) in your garden or pots. Avoid contaminated soil (near fertilizers or chemicals).
- ● Small container or tray – A shallow dish, plastic cup, or white plate (white helps contrast colors for better accuracy).
- ● Distilled water – ¼ cup (tap water may contain minerals that skew results).
- ● Spoon or small spatula – For mixing soil and water.
- ● Timer – Your phone works! Strips need 30–60 seconds to react.
- ● pH color chart – Usually included with strips, but print a backup if needed.
- ● pH meter – For double-checking results (e.g., Bluelab pH Meter).
- ● Soil sieve or fine mesh screen – Removes rocks/debris for cleaner samples.
- ● Notebook & pen – Log pH levels by plant type/location for tracking changes.
- ● pH adjusters – Lime (to raise pH) or sulfur/peat moss (to lower pH) if you plan to amend soil.
- ● Plastic gloves – Keeps hands clean when handling soil or chemicals.
How to use soil pH strips for perfect plant growth
Here’s how I test soil pH like a pro—fast, accurate, and with zero guesswork.
🌱 Step 1: Collect a Fresh Soil Sample
Grab a clean, dry container and dig into the soil where your plants are growing. Use a small trowel or spoon to collect soil from 2-3 inches deep—this is where the roots actually live. Avoid surface dirt, which can be contaminated with mulch, fertilizer, or debris.
Take 4-5 small samples from different spots in your garden or pot. Mix them together in your container to get an average reading. The more representative your sample, the more accurate your results will be. If testing a container plant, scoop soil from multiple spots around the edges and center.
💧 Step 2: Moisten the Soil for Testing
Add just enough distilled water to the soil to make it damp but not soggy—think of it like a wrung-out sponge. Distilled water is crucial because tap water can contain minerals that skew your pH reading. Stir gently with a clean spoon until the soil is evenly moist.
Let the mixture sit for 5-10 minutes to ensure the water fully integrates. You’ll know it’s ready when you can press a finger into the soil and feel slight resistance, but it shouldn’t crumble or stick together like wet clay.
✂️ Step 3: Dip the pH Strip and Compare Colors
Hold the pH strip by the edges to avoid contaminating the testing area. Dip it into the moist soil for 1-2 seconds, then remove and lay it flat on a clean, dry surface. Wait exactly 30 seconds—no longer, no shorter—before comparing the color to the chart provided.
Match the strip’s color to the closest shade on the chart. Most strips include a pH range of 4.0 to 9.0, with colors shifting from deep red (acidic) to bright green (neutral) to blue (alkaline). Write down your result—this is your soil’s current pH.
☀️ Step 4: Adjust pH Based on Plant Needs
Now that you know your soil’s pH, compare it to the ideal range for your plants. For example, blueberries and azaleas thrive at pH 4.5-5.5, while tomatoes and peppers prefer 6.0-7.0. If your reading is off, it’s time to act.
To lower pH (make soil more acidic), mix in elemental sulfur or peat moss. For raising pH (making soil more alkaline), use lime or wood ash. Always follow package instructions for application rates—too much can damage plants just as much as too little.
⏰ Step 5: Retest After Adjustments
Wait 4-6 weeks after amending your soil before retesting. This gives the soil time to stabilize and the amendments time to take effect. Collect another sample, follow the same testing steps, and compare the new reading to your original result.
If the pH hasn’t shifted enough, you may need to adjust further. Keep track of your progress—some soils resist change, especially heavy clay. Patience and consistency are key to getting your soil just right for your plants.
Tips & tricks for perfect soil pH testing
These game-changing tips will help you get the most accurate and reliable soil pH readings every single time.
Sampling Strategy: I can't stress enough how important it is to collect your 4-5 samples from different spots in Step 1. I once tested a single spot in my garden and got a reading of 7.2, but when I tested multiple spots, I discovered pH levels ranging from 6.5 to 7.8! The roots experience different conditions throughout the planting area, so this thorough sampling gives you a true picture of what your plants are actually dealing with.
Distilled Water Matters: The instructions mention using distilled water in Step 2, and I'll tell you why this is non-negotiable. Tap water contains minerals that can dramatically alter your pH reading. I once used regular tap water and got a reading of 6.8, but when I retested with distilled water, the true pH was 5.9. That's a huge difference for acid-loving plants like blueberries! Always use distilled water for accurate results.
Timing is Everything: Those 5-10 minutes in Step 2 might seem like a short wait, but they're crucial. This resting period ensures the water fully integrates with the soil particles. I've noticed that skipping this step can lead to inconsistent color development on the pH strip. For best results, set a timer and let the mixture sit undisturbed during this period.
Color Comparison Pro Tip: When comparing colors in Step 3, do it under natural light if possible. Artificial lighting can sometimes make colors appear slightly different. I keep a small notebook where I record my results along with a description of the lighting conditions. This helps me track patterns over time and gives me more confidence in my readings.
Pro Tips for Soil Ph Strips
- These game-changing tips will help you get the most accurate and reliable soil pH readings every single time.
- Sampling Strategy: I can't stress enough how important it is to collect your 4-5 samples from different spots in Step 1.
- Distilled Water Matters: The instructions mention using distilled water in Step 2, and I'll tell you why this is non-negotiable.
Frequently asked questions
Got questions about using soil pH strips?
You’re not alone! Here are answers to the most common queries to help you get the most out of your testing—no guesswork required.
How accurate are soil pH strips compared to a pH meter?
Soil pH strips are quick and convenient, but they’re not as precise as a digital pH meter. Strips typically offer a ±0.5 pH unit range, while meters can measure to ±0.1. For general gardening, strips are great—just re-test if results are borderline (e.g., pH 6.5 vs. 7.0) for critical plants like blueberries or tomatoes.
How long do the results last on a soil pH strip?
Most strips show results in 10–30 seconds, but the color fades over time. For best accuracy, compare within 30 seconds and take a photo if you need to reference it later. Store unused strips in a cool, dry place to preserve their potency.
Can I use pH strips on hydroponic or soilless mixes?
Yes! Just mix the sample with distilled water (1:2 ratio) to mimic soil conditions. Avoid tap water, as minerals can skew results. For hydroponics, test your nutrient solution separately—some pH strips are designed specifically for water-based systems (check the label).
What if my strip turns a weird color or won’t change?
Here’s your troubleshooting guide:
No color change? Your soil may be extremely acidic (pH <4) or alkaline (pH >9). Try a broad-range strip or dilute the sample with distilled water.
Streak or uneven color? You might’ve used too much soil—stick to the pea-sized sample rule. Stir gently to avoid clumps.
Faded too fast? The strip could be old. Store them in an airtight container with a desiccant packet.
Are there eco-friendly or reusable alternatives to disposable strips?
If you’re eco-conscious, consider:
- Reusable pH pens (e.g., Bluelab or Apera): Durable, battery-powered, and accurate for repeated use.
- Litmus paper in a jar: Some brands sell refillable kits where you dip strips into a solution.
- DIY vinegar/baking soda test: A low-tech hack for rough estimates (but not as precise as strips).
For frequent testers, the upfront cost of reusable tools pays off in the long run!
Wrapping up and next steps
Testing your soil’s pH with soil pH strips is a game-changer for plant care—it’s quick, easy, and gives you the power to fine-tune your garden’s health! 🌱 Whether you’re troubleshooting stunted growth or aiming for that perfect bloom, knowing your soil’s acidity or alkalinity is the first step toward thriving plants.
Now that you’re armed with the know-how, grab those strips and get testing—your green thumb (and plants!) will thank you.
Next step: Keep a simple pH journal to track changes over time and adjust your soil amendments as needed. Happy gardening!