Tools
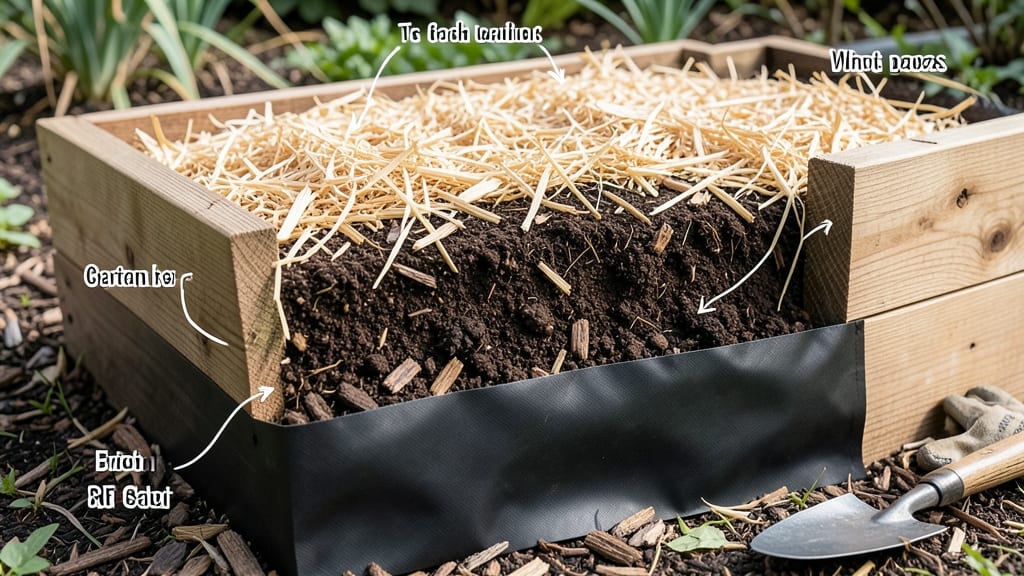
Building raised garden beds with the right soil layers turns your plot into a thriving ecosystem where roots breathe and nutrients last all season. 🌱 I learned the hard way that cheap fill dirt leads to compacted soil and stunted growth—until I layered my first bed properly and watched my tomatoes grow twice as fast.
The secret isn't just throwing in compost; it's creating a balanced structure that drains well, holds moisture, and feeds plants exactly what they need.
Start with a 4-inch bottom layer of coarse material—gravel or broken bricks—to prevent root rot from soggy soil. Next comes 6 inches of organic matter: a mix of composted leaves, straw, and aged manure for nutrients.
Top it with 6-8 inches of high-quality garden soil blended with perlite or vermiculite for aeration. This setup works for vegetables, herbs, and flowers, but adjust the organic layer thickness if you're growing heavy feeders like corn or squash.
You'll notice plants establishing faster and staying healthier through heat waves or droughts. The right layers keep roots from overheating in summer or freezing in spring, while the organic material breaks down slowly, feeding your plants for months.
Even my black thumb can't kill plants in a bed built this way—it's that foolproof.
For container gardens or small spaces, scale down the layers but keep the same ratios. And if you're in a rainy climate, add a 2-inch sand layer at the bottom to improve drainage without sacrificing nutrients.
The key is balance: too much sand drains too fast, too much clay holds too much water—find that sweet spot for your plants.
📚 In This Guide
- What you need
- Instructions
- Tips and common mistakes
- Wrapping up and next steps
What you need
- ● Raised Garden Bed Frame: Untreated wood (cedar or redwood recommended) or composite lumber – 4x8 ft or custom size
- ● 2x6 or 2x8 boards (thickness: 2–3 inches) – 4–8 pieces (depending on size)
- ● Galvanized screws or decking screws (2.5–3 inches long) – 50–100 screws
- ○ Corner brackets (optional but recommended for stability) – 4–8 brackets
- ● Soil & Amendments: Bottom Layer (Drainage): Coarse gravel (1–2 inches) or crushed stone (½ inch) – 1–2 cubic feet
- ● Middle Layer (Structural Support): Composted wood chips or straw (2–4 inches) – 2–4 cubic feet
- ● Top Layer (Growing Medium): High-quality topsoil (6–12 inches deep) – 1–2 cubic yards (for 4x8 ft bed)
- ● Compost (20–30% of topsoil mix) – ½–1 cubic foot
- ○ Perlite or vermiculite (optional, for aeration) – 1–2 gallons
- ● Tools: Measuring tape
- ● Circular saw or handsaw
- ● Drill/driver
- ● Wheelbarrow or shovel (for soil transport)
- ● Level (to ensure even bed height)
- ● Garden gloves & knee pads (for comfort!)
- ● Landscape fabric (to block weeds between layers)
- ● Organic mulch (straw or shredded leaves for top layer)
- ● pH testing kit (to check soil acidity/alkalinity)
- ● Drip irrigation kit (for efficient watering)
How to build the perfect raised garden bed soil layers
Here's the layering system I swear by for roots that thrive and plants that grow like crazy.
🪴 Step 1: Start with a Sturdy Base Layer
Begin with 2-4 inches of coarse material at the bottom—gravel, broken bricks, or wood chips work best. This layer ensures proper drainage and prevents waterlogging, which is especially critical for heavy clay soils. I like to use 1-2 inches of gravel first, then add 1-2 inches of larger wood chips on top to create a natural filter.
Compact this base layer lightly with your hands or a board to create a stable foundation. You'll notice the soil above will settle naturally over time, but this prevents the bed from collapsing. If your garden bed sits on grass or weeds, lay down cardboard or landscape fabric before adding the gravel to smother unwanted growth.
🌱 Step 2: Build the Nutrient-Rich Middle Layers
Next, add 4-6 inches of compost—this is where the magic happens. I use a mix of well-aged cow manure compost and leaf mold for structure and nutrients. Spread it evenly, then top with 2-3 inches of peat moss or coconut coir to improve moisture retention and aeration.
For extra fertility, I sprinkle a 1-inch layer of worm castings over the compost. This provides slow-release nutrients and beneficial microbes that will colonize the soil. Mix these layers lightly with a garden fork to blend them without compacting too much. You'll see the soil darken and smell rich—this is your sign the layers are ready for the final step.
☀️ Step 3: Finish with Topsoil for Planting
Top off your bed with 6-8 inches of premium topsoil—this is where your plants will root and grow. I like to use a 50/50 blend of garden soil and compost for the top layer to ensure it's loose and fertile. Smooth the surface with a rake, leaving it slightly uneven for better water absorption.
Don't skip this layer—it's the foundation for healthy root development. You'll want the final soil surface to be 1-2 inches below the bed's rim to allow for watering and mulching. Press down lightly with your hands to eliminate air pockets, then give it a gentle watering to settle everything in place.
💧 Step 4: Add Mulch to Protect and Retain Moisture
Spread 2-3 inches of organic mulch—straw, shredded leaves, or wood chips—over the topsoil. This keeps moisture in, weeds out, and regulates soil temperature. I prefer shredded hardwood mulch because it breaks down slowly and adds nutrients as it decomposes.
Leave a 1-inch gap around plant stems to prevent rot. You'll notice the mulch darkens the soil and reduces evaporation, which means less frequent watering. This layer also protects against erosion from rain or overhead watering, keeping your bed looking neat and productive.
Tips & tricks for perfect raised garden bed soil layers
A few simple strategies will ensure your raised bed becomes a thriving ecosystem for plants.
Drainage Layer Depth: The 2-4 inches of coarse material in Step 1 might seem like overkill, but trust me—this prevents soggy roots. If your area has particularly heavy clay, consider adding an extra inch of gravel. I've seen plants struggle when drainage is compromised, so don't skimp here. The wood chips on top help filter water while allowing excess to drain through.
Compost Quality Check: In Step 2, the 4-6 inches of compost is where most nutrients come from, but not all compost is equal. Look for dark, crumbly compost that smells earthy—not rotten. I mix my well-aged cow manure compost with leaf mold because the leaf mold adds structure while the cow manure provides nitrogen. If your compost is still breaking down (hot and smelly), let it age longer first.
Topsoil Blend Tip: When finishing with 6-8 inches of premium topsoil in Step 3, that 50/50 blend with compost is key. I've found that adding too much garden soil can compact easily, while pure compost can mat down over time. The blend gives you the best of both worlds—fertility from compost and structure from garden soil. Press lightly with your hands to eliminate air pockets, but don't overdo it or you'll create compaction.
Mulch Application: The 2-3 inches of mulch in Step 4 isn't just decoration—it's a game-changer. I've seen beds lose moisture quickly when mulch is skipped. Shredded hardwood mulch breaks down slowly, adding nutrients over time, while straw mulch works faster but needs replacing more often. That 1-inch gap around plant stems prevents rot by allowing air circulation.
Pro Tips for Raised Garden Bed Soil Layers
- A few simple strategies will ensure your raised bed becomes a thriving ecosystem for plants.
- Drainage Layer Depth: The 2-4 inches of coarse material in Step 1 might seem like overkill, but trust me—this prevents soggy roots.
- Compost Quality Check: In Step 2, the 4-6 inches of compost is where most nutrients come from, but not all compost is equal.
Frequently asked questions
Got questions about building the perfect raised garden bed soil layers?
You’re not alone! Here are answers to the most common queries—from timing to troubleshooting—to help you grow with confidence.
How deep should each soil layer be in a raised bed?
Aim for 12–18 inches total depth in your raised bed. Break it down like this:
- Bottom layer (4–6 inches): Carbon-rich materials (straw, wood chips, or composted leaves).
- Middle layer (6–8 inches): Balanced mix of topsoil and compost (50/50).
- Top layer (2–4 inches): Finished compost or aged manure for nutrients.
Can I build a raised bed in fall for spring planting?
Fall is ideal
—build your bed 4–6 weeks before your first frost. The soil will settle over winter, and you’ll avoid spring rush. Just don’t plant until soil temps hit 50°F+ (use a soil thermometer). Pro tip: Cover with mulch to protect layers from erosion.
What’s a budget-friendly alternative to store-bought soil?
Mix your own! Skip pricey bags with:
- 50% topsoil (from a local supplier or garden center).
- 30% compost (homemade or municipal yard waste).
- 20% perlite/vermiculite (for drainage) or coarse sand (if you’re thrifty).
Why are my plants wilting even though I layered the soil correctly?
Wilting often signals poor drainage or pests. Check these fixes:
- Add 1–2 inches of coarse sand or perlite to the bottom layer if water pools.
- Inspect for grubs or slugs—sprinkle diatomaceous earth or copper tape.
- Ensure 3–4 inches of mulch on top to retain moisture (not smother roots!).
How often should I refresh the soil layers in a raised bed?
Top up layers every 1–2 years with:
- 1–2 inches of compost (spring and fall).
- Balanced fertilizer (like 5-5-5) if plants look nutrient-deprived.
Wrapping up and next steps
Building the perfect raised garden bed soil layers is all about balance—combining science with your green thumb to create a thriving ecosystem for your plants. 🌱 Whether you’re a beginner or a seasoned gardener, layering your soil correctly ensures strong roots, vibrant growth, and bountiful harvests.
Now that you’re armed with the right knowledge, it’s time to roll up your sleeves and get planting!
Ready to take the next step? Start by sketching your bed layout, gathering your materials, and layering with confidence. Your future garden awaits—happy digging! 🌿